 Christian Melendez
Hello World .NET Core and Docker with VS
Tweet Sat 28 January 2017Today I want to share with you how you can create a Hello World API with .NET Core but running inside of a Docker container and not just that, we will be able to even debug the API with Visual Studio (VS) and then I'll explain how easy is to push an image that is ready for a production environment, so let's get started.
What I need to have first?
In order for this demo to work you need to have the following installed in your computer (I'm using Windows 10):
- Visuatl Studio 2017 RC, you can download it here
- Docker for Windows, you can download it here
- If you're using more than one drive in your computer and you installed docker in a different drive than your project files, you need to share that drive in Docker, you can do it following this guide here. Read this part again, you might not be able to debug the API in VS if you don't do this.
Once you have everything installed/configured, you can continue.
Create a Hello World API
We're not just going to create a simple API (you might know how to do this already) but I'm going to focus on how you can integrate Docker to your project.
- Open your VS as an Administrator (right click and "Run as Administrator")
- Go to File -> New -> Project
- Choose Templates -> Visual C# -> .NET Core and then "ASP.NET Core Web Application (.NET Core)"
- Put a name to the project (in my case "HelloDocker"), choose the location of files and then click "OK"

After this, you should be seeing another screen where you need to enable docker support (you can do it later too).
- Choose "Web API" under "ASP.NET Core Templates 1.1"
- Check the "Enable Docker Support" box and click "OK"

Let's wait a little bit and you should be seeing something like this:

What's new here? If you notice you now have a new section in the solution called "docker-compose" and inside your project you have a "Dockerfile". I'm not going to explain why you have those files and what they do (for more details go here). Now, let's see the magic when debugging the API.
- Open the ValuesController.cs file (In the web project, Controllers/ValuesController.cs)
- Put a break point in the line where return a list of values (line #16)
- In the solution explorer, go to "docker-compose", right click and then Debug -> Start new instance. If you do it in the project, it will launch the IIS Express and you don't want to do that right now. You should start seeing in the output how the image is being built by copying all the binaries inside the container.
- When it finishes, it will launch a new window in your browser
- In the same window, go to the /api/values URL and VS will catch that call in the break point we put
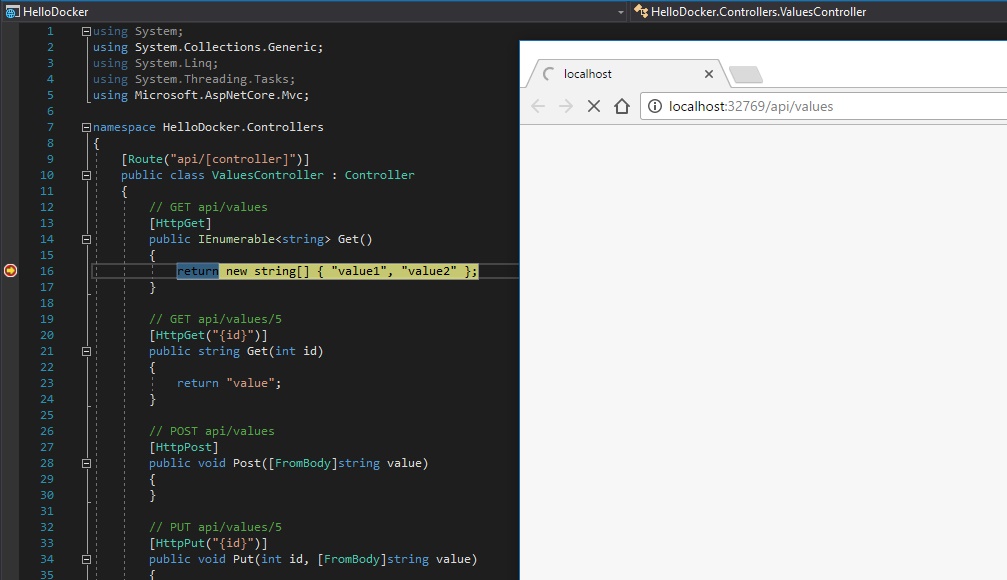
Now, this where you can start screaming excited about what just happened (I did). If you don't get it, let me explain what just happened: VS built a container with the code you have in the project, then it launched the container and attached it to your VS so you can debug it. This means that you're not just testing locally but you're testing in the same way that the API will run in the production server. That's really awesome, I loved it.
Close your mouth now please, we need to do some things to finish the demo :) ... In the same line that you put the breakpoint, let's add a new value, we're gonna push this to the Docker Hub.
What about deployment to Production server?
I know, that was my first question, so let's open the terminal window (I use Powershell) and let's do it, but first, we need to build the API in release mode.
- In VS, change the configuration from Debug to Release mode and build the solution again. Why? It will start creating the image for a production environment (you never release your APIs in Debug mode, right?) and it chooses the best container base image that Microsoft team have configured for those environments, so it's not from the same image base we used to debug our code. More info here
- Open your terminal window and run "docker images"
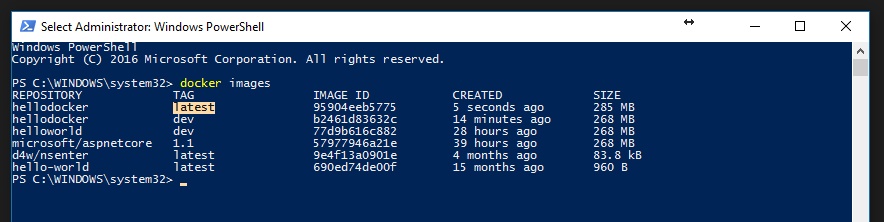
Now, you see that I remarked the one with the "latest" tag, that's the one we need to use for production, the other one (with the tag "dev") it's the one just for development. Ok, let's push it to your docker registry.
- Login to your Docker Hub account here (If you don't have one, create it please)
- Now, let's create a public repository, mine is called "hellodocker"
- Go back to your terminal and run the "docker images" command
- Copy the IMAGE ID of the hellodocker with the latest tag and tag it with the name of your repository that you just created. In my case I need to run this "docker tag 95904eeb5775 christianhxc/hellodocker"
- List the images and you should see the one you just created
- Login to your docker repository by running "docker login"
- Push the image, in my case I ran "docker push christianhxc/hellodocker", wait a little bit and you should see the image in Docker Hub (it might take some time to see it)


How to run the container without VS?
Just open your terminal and run the following command:
docker run -d -p 8000:80 christianhxc/hellodocker
Open your browser in http://localhost:8000/api/values and see the latest version of the API
So that's all, now you can easily create .NET Core apps with Docker support :)